
Here’s another recipe from the past that I’m pulling forward to share with you again. This Apple Galette recipe was originally posted in October of 2008.
Fall is here, the holidays are near, and the season of eating is officially upon us. For me, that means it’s time for apple pie. This is my third sixth year at Pinch My Salt, and every year I have grand plans to write about holiday recipes. So far, I’ve failed miserably! Sure, I always manage to post a few pumpkin recipes here and there, but when it comes to the real stuff: the pies, the turkey, the cranberries, the dressing, I always step back and let the pros help you out. (Edit: I do have more holiday recipes on the blog now. You can find them here.)
But this year will be different. If nothing else, I will make sure at least one of you bakes a homemade apple pie for the very first time! Because let me tell you, there is something magical about seeing your very first made-from-scratch pie come out of the oven. It won’t be perfect, they never are. But it will be the best pie you’ve ever tasted.
I remember my first apple pie. I was 19 years old, it was Thanksgiving, and it was my very first holiday away from home. It was exciting to be out on my own, preparing a holiday meal with friends for the first time, but I also remember calling my mom in tears that morning because I was homesick.
We made a lot of mistakes that first year. For one, I think we forgot to take the plastic bag of giblets out of the turkey before stuffing and roasting it. Ooops! But you have to start somewhere, right? For me, I started with my very first apple pie. I don’t remember which recipe I used, I don’t even remember the process. But I do remember the feeling I had when it came out of the oven. To me, it was perfect! I was so proud, I even took a photo of it.
Years later, looking at that photo of my first apple pie, I could see a million things wrong with it. The crust didn’t even brown, not a bit. But here’s the thing about a homemade pie: nobody cares what it looks like! It’s homemade pie and it’s always, always, always better than a store-bought one.
But it seems that a lot of people have a fear of pie crust. I’ll admit that fifteen years later, I still don’t make a perfect crust. But at the same time, in fifteen years, I’ve never made a crust that wasn’t eaten! It’s time to get over the fear, and just do it.
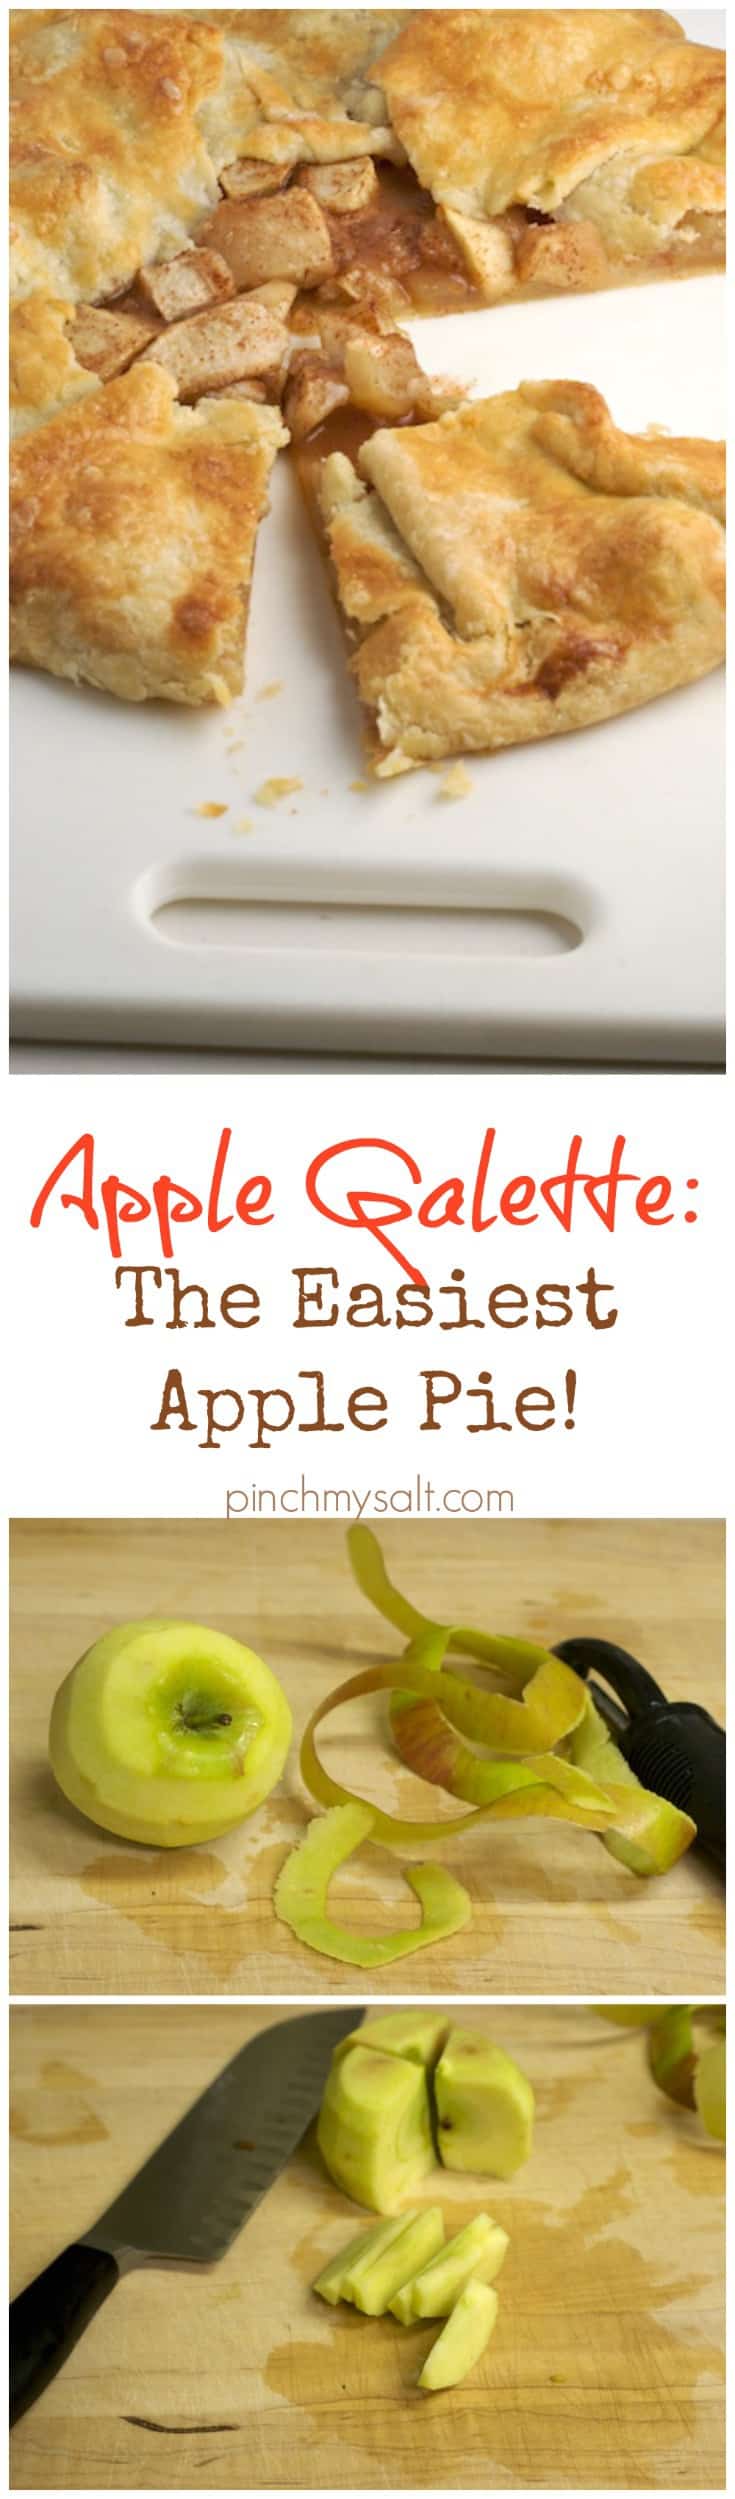
One way to ease yourself into pie making, is to start with a free-form pie or tart known as a galette. To me, an apple galette may sound fancy, but it’s really just an informal apple pie. I make one maybe once or twice a year when I’m craving something special for dessert, and it’s always thrown together at the last minute. It seems like we always have a few apples rolling around in the fruit bin and this house never runs out of flour or butter! I bet the same is true for most of you.
Now because this it is something that is always an impromptu dessert, I don’t have a real recipe or method. I can’t give you exact instructions that you will follow to the letter. But that’s fine. I prefer that you just jump in and give this one a try.
You will be making an actual pie pastry, so it’s good practice for your next real pie. But it’s put together in such a way that it just doesn’t matter if you mess up. It’s supposed to be messy. And the great thing about a galette is that the worse it looks, the more ‘rustic’ it becomes. Haven’t you ever wanted to make a rustic tart? Here’s your chance!
You can use any pie crust recipe you would like for your galette, but I am going to suggest one over at Simply Recipes. I used it last night and I think it was the best I’ve ever made! I basically halved the recipe for Elise’s Perfect Pie Crust, since I only needed a single crust.
Now let me walk you through the galette I made last night:

First, peel, core and slice about four apples. If they are small, you can use six. You could probably even use more. I just like a high ratio of crust to apples when I make a galette. It doesn’t matter what type you use, I used a couple granny smith, a braeburn, and some other red apple that I can’t remember now. Just use what you have, or what you like.
When I prepare apples for pie, this is how I do it:

First, peel the apple using a paring knife or vegetable peeler. I prefer this peeler.

It’s always fun to try to remove the peel in one long curly strip! I tried, but it broke just as I was about to finish!

Next, cut a thin slice off the top of the apple.

Then do the same with the bottom of the apple.

The apple will now sit steady on the cutting board to make it easier to quarter, and remove the core.

Now cut the apple into four quarters. I like to do this with the apple turned upside down.

Next, remove the core from each apple quarter. It seems to be easier to cut out all of the core if you start from the bottom, that’s why I said to turn the apple upside down when you quarter it.

You now have an apple quarter that can be easily sliced into pieces.

Finally, cut each apple quarter into five or six slices.

And now you have peeled, cored, and sliced one apple. Only a few more to go!
Put all of your apple slices in a bowl and toss with a some sugar (I used about 1/4 cup), sprinkle in a bit of cinnamon, and a tablespoon of flour. Toss it all together and set the bowl aside.
Now preheat the oven to 400 degrees while you make the pastry. This is important, don’t forget to turn on the oven!
Next, clear a large space on a countertop or table and sprinkle it lightly with flour. If you have a pastry board, even better. Have a rolling pin handy and more flour available for sprinkling. A dough scraper will also come in handy if you have one.
Also get out a large cookie sheet, preferably with rim. I use a half sheet pan. Line it with parchment paper and have it handy.
Now, put together your pastry. If you would like instructions with photos, go to Simply Recipes. But we are only using half of her recipe, so use the ingredient amounts that I list here.
Galette Pastry:
1 1/4 cups all-purpose flour
1/2 t. salt
1/2 cup chilled butter, cut into pieces (one stick)
3 tablespoons ice water
Put flour and salt in the bowl of a food processor and pulse to combine. Add butter and pulse until the largest butter pieces are the size of peas. Add water, one tablespoon at a time, pulsing to mix. The mixture won’t look like it’s holding together, but pinch it, and it should stick together.
If you don’t have a food processor, put the flour and salt in a large bowl and whisk to combine. Cut the cold butter into small pieces and toss with the flour mixture. With your fingertips, quickly rub the butter into the flour mixture until the mixture resembles very coarse crumbs and there are still some small chunks of butter left (you may also use a pastry cutter). Add water, one tablespoon at a time, mixing and tossing with a wooden spoon. When the mixture just starts to clump together, continue to the next step.
Dump all the flour and butter pieces out onto the floured counter or board, and gather it and press it together into a disc shape. At this point, the dough can be wrapped in plastic and refrigerated for up to a couple of days. But we are going to roll it out immediately. If you do refrigerate it, let the dough sit out at room temperature for 10 minutes before continuing to the next step.
Roll dough out into a large circle, making sure to add a bit of flour on top and underneath the dough occasionally to prevent it from sticking to the counter. Try to roll the dough as evenly as possible to about 1/8 inch thick. The circle doesn’t have to be perfect and if the dough starts splitting and tearing, just patch it together as best you can. Most importantly, work quickly and make sure to keep the counter underneath lightly floured to prevent sticking! The circle will get big! That’s what you want.
Now gently wrap the dough around the rolling pin and transfer it to the sheet pan. Try to unwrap the dough so that it is somewhat centered on the pan. The pastry circle will overlap the sides of the pan by quite a bit, that’s what you want. Now dump the apple right into the center of the circle and spread them out a bit.
At this point I usually drop a few little pieces of butter over the tops of the apples. It’s up to you.
Next, just fold the edges of the pastry over the apples, sealing any holes that appear along the edges as you go. You want to seal the holes and cracks so that the juices don’t escape while it’s baking. The pastry shouldn’t cover the apples completely in the center.
If you want to try to make it look fancy, go ahead. I don’t. I just fold it up and hope for the best!
Finally, I beat one egg with a splash of water and lightly brush the pastry with the egg wash. Then I sprinkle a bit of sugar over the whole thing. This is optional, but it looks nice!
Now put the baking sheet with the galette into the preheated 400 degree oven and bake for about 35 minutes.
Now for the best part: It’s time to eat!

I know that there are many different ways to make a pie crust: butter, shortening, even oil! And everyone likes to argue about what makes the flakiest, most tender crust. For pies, I tend to split the difference and use half butter and half shortening. But an all-butter pastry will always have the best flavor in my book. The only problem I have with an all-butter crust, is that it doesn’t hold it’s shape very well. That’s what is so great about making a galette! It doesn’t have any fancy fluting, so it really doesn’t matter if it doesn’t hold it’s shape as well. I strongly urge you to give the all-butter pastry a try this time, the flavor is out of this world!
I generally do not use a food processor for pie pastry, but I gave it a try this time. Guess what? The results were great! So, I may start actually using my Cuisinart for more than bread crumbs now. But if you don’t have a food processor, just cut the butter into the flour with your fingertips or a pastry blender like I’ve always done.
Give it a try, have fun, and let me know what happens!
- Plum Galette from Simply Recipes
- Rhubarb Ginger Galette from Simply Recipes
- Apple Rhubarb Galette from Daily Unadventures in Cooking
- Rustic Pear and Apple Galette from The Kitchn
- Apple Pie from Pots on the Stove
- Smoked Apple Pie from Bucky’s Barbecue and Bread
Pie Pastry Recipes:
- Perfect Pie Crust from Simply Recipes
- Pie Crust 101 from Smitten Kitchen
- How to Make Flaky Tender Pie Crust from Kitchen Parade
- Gluten-Free Pie Crust from Gluten-Free Girl
Michelle says
Kevin says
AndreaDomingas says
Brittany says
lisa from dandysugar says
cleek says
Julia says
Betty says
Liz S says
Rachel says
brian says
Colby says
Taylor says
Maxine says
Alex says
Jem says
kim says
Elizabeth Jones says
Susan says
Bea says