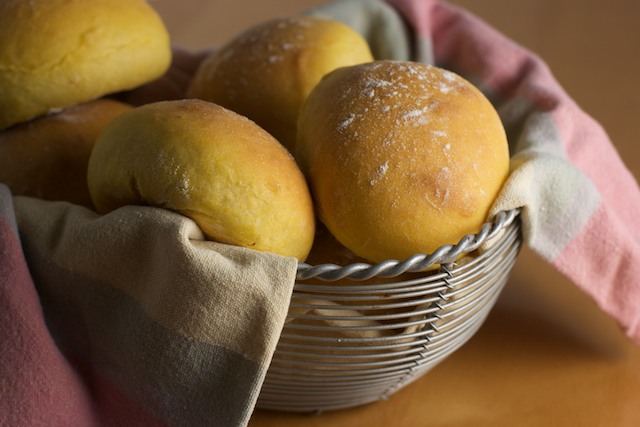
So this is the second installment of our holiday recipe series, and I couldn’t be happier to share this dinner roll recipe with you!
In my family, the dinner rolls at our holiday meals are never homemade. For years, my grandmother would pick them up at a local bakery, but at some point we switched to the big bag of dinner rolls from Costco and I don’t think there’s anything wrong it. My sister and I still love those rolls from Costco. And really, even supermarket bakery rolls taste pretty good if you pop them in the oven for a few minutes.
But there is definitely something to be said for homemade bread. And the first time I tasted my (now ex, but still wonderful) mother-in-laws homemade dinner rolls at Christmas I realized what a difference it makes. While the dinner rolls are always an afterthought at the gatherings on my side of the family, the bread takes center stage at the meals we eat in Oregon. Everyone looks forward to Sharon’s warm and buttery dinner rolls and those rolls are one of the (many) reasons I’m happy to be spending Christmas in Oregon this year!
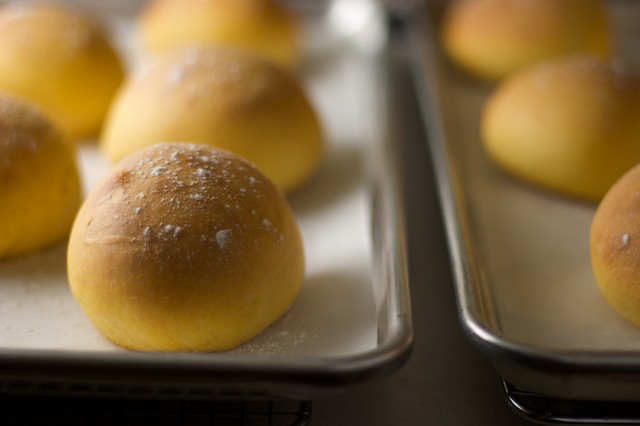
While I’m not going to share my mother-in-law’s dinner roll recipe today, I do have a great recipe for Sweet Potato Buttermilk Rolls that I can’t wait for you to try. Since Amanda and I wanted to put a new twist on some holiday recipes for you this year, I decided it would be fun to experiment with turning some plain old potato rolls into sweet potato rolls. While using sweet potato puree in these rolls adds beautiful color, the combination of sweet potato and buttermilk also results in a wonderful flavor!
When I made these the first time at our big pre-holiday dinner, I tried adapting a Potato-Buttermilk Roll recipe from Williams-Sonoma Essentials of Baking. While it’s a great book, and I’m sure the Potato-Buttermilk Rolls would have been great if I had followed the recipe exactly, I was less than impressed with the Sweet Potato Rolls I created that night. I mean they were good, and everyone except me seemed to enjoy them, but they weren’t what I was looking for. So, I decided to give it another try and ended up creating my own recipe for Sweet Potato Buttermilk Rolls.
I finished the final batch last night and took the still-warm rolls to my sister’s house for dinner. I am happy to report that we were all more than satisfied with the outcome! We ended up eating them with that leftover Curried Turkey Salad and the combination was terrific. So now I know that these rolls will not only be great with a big turkey dinner, they’ll also be perfect for your leftover turkey sandwiches.
I used my stand mixer to knead the dough for this recipe, but if you aren’t afraid of getting your hands messy, these can be made completely by hand. And please, don’t be afraid of the yeast! You will need a few hours to make these, but the majority of that time is spent just waiting for dough to rise. The best thing about making homemade bread is that it’s possible to take care of other holiday preparations while the dough is rising. But unless you’re planning on being really organized on Turkey day, I suggest making them the day before then reheating for a few minutes in the oven right before serving.

This my dough after kneading for 7 minutes.
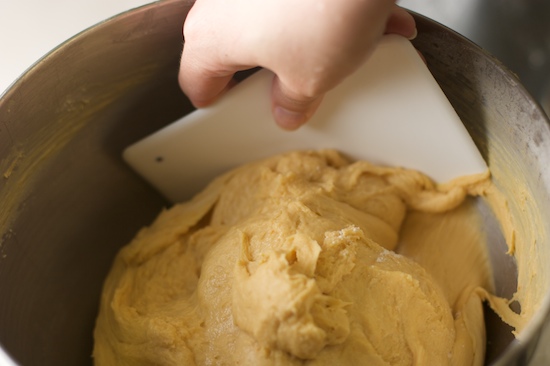
A dough scraper is inexpensive (usually about a dollar) and makes removing dough from a mixing bowl much easier!
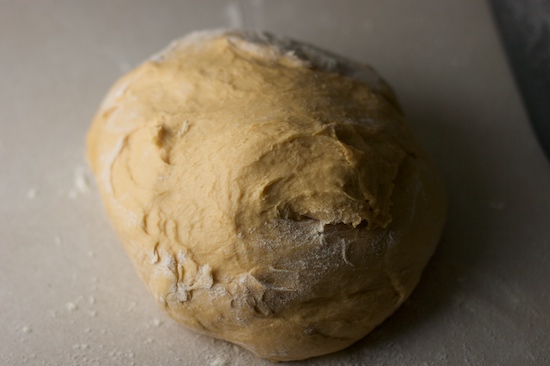
Dump the dough out onto a lightly floured countertop.
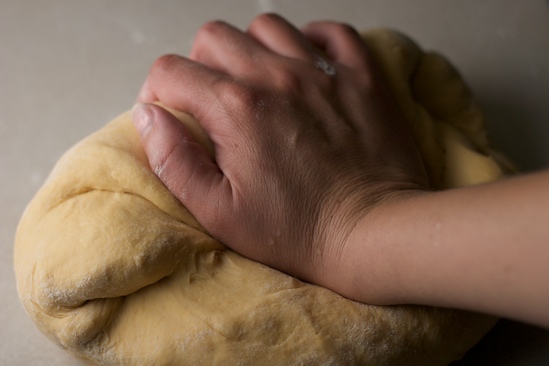
Knead the dough lightly and form into a smooth ball.
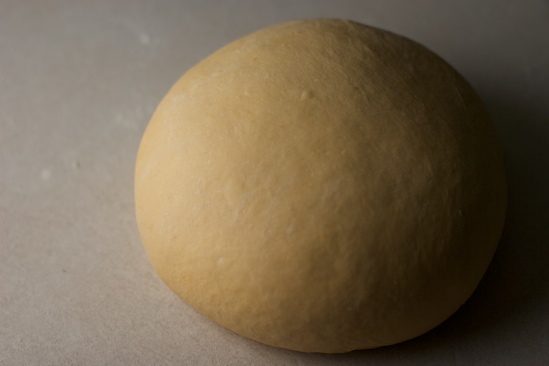

Place dough smooth side down in a greased bowl then turn over so both sides are coated.
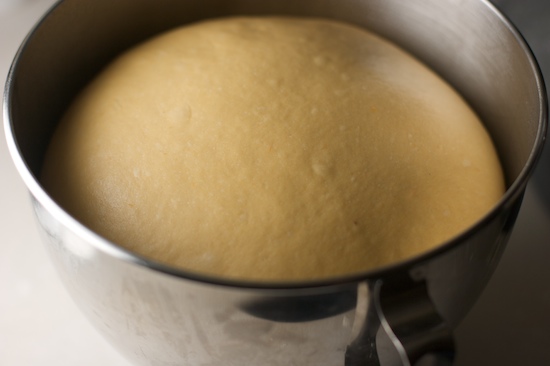
Let dough rise in a warm place until doubled in bulk.
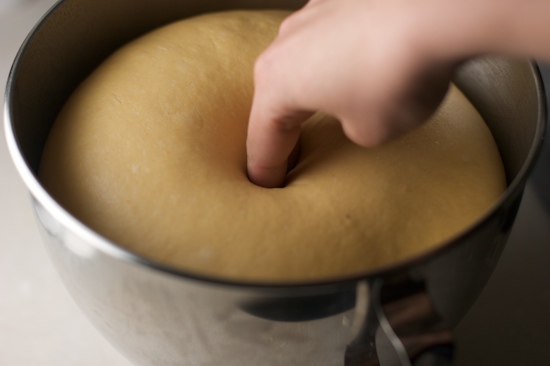
To check if dough has doubled, push your finger into the dough. If the indentation remains, it’s ready to go!

This dough doubled and ready to go in just over an hour.
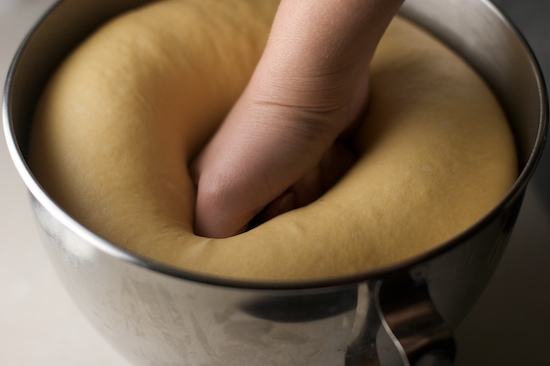
Push dough down with your fists to deflate it then turn it out onto your lightly floured work surface.
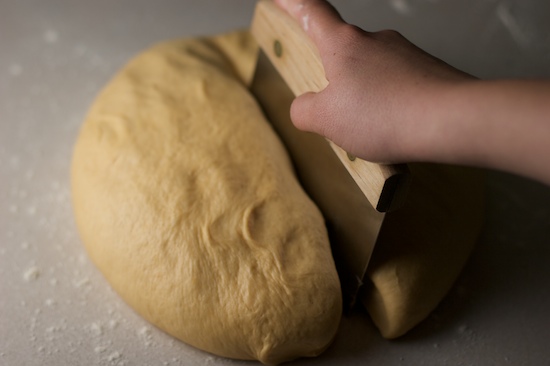
Cut the deflated dough in half with a knife or bench scraper.
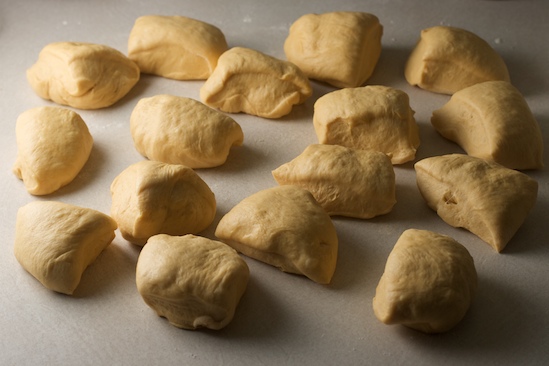
Divide each half into eight equal pieces for a total of 16 (or more if you prefer smaller rolls).
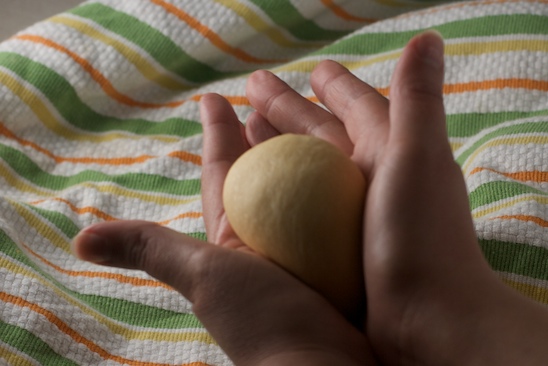
Shape the rolls into balls by rolling against the countertop or between your hands. For smooth rolls, pull the skin taut and pinch together at the bottom.
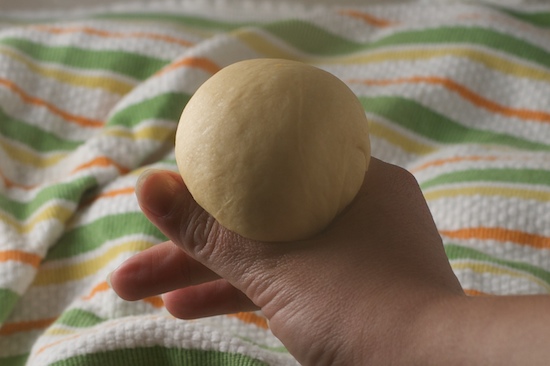
Forming a smooth roll.
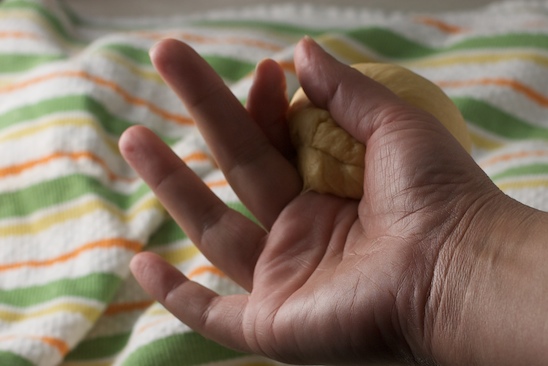
Pinch the bottom together to form a taut skin.
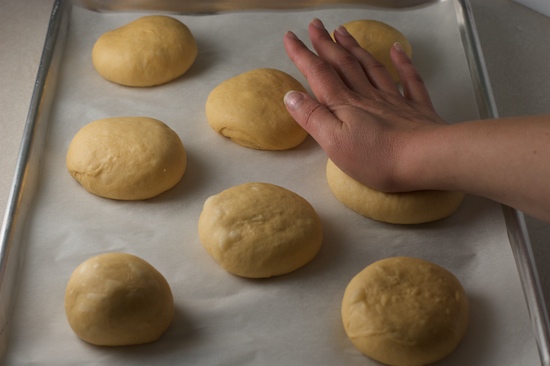
Place rolls on parchment-lined baking sheet and flatten slightly with the palm of your hand.
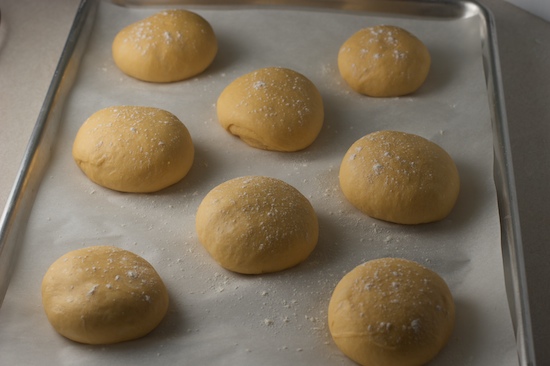
After they have risen, dust lightly with flour then place in preheated 375 degree oven.
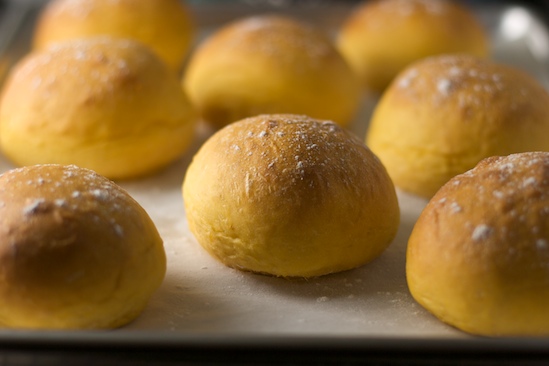
Bake rolls for 20-25 minutes or until lightly browned. Enjoy warm with lots of butter!

Sweet Potato Buttermilk Dinner Rolls
Slightly sweet with a beautful color, these sweet potato buttermilk dinner rolls will be the star of your holiday table!
Ingredients
- 1 cup mashed sweet potato or yam, slightly warm or at room temperature*
- 2 cups buttermilk, just slightly warmed**
- 1 egg, at room temperature
- 1/2 cup butter, melted and cooled slightly
- 1/4 cup sugar
- 2 packets active dry yeast
- 2 1/2 teaspoons salt
- 6 1/2 cups bread flour (maybe up to 7)
Instructions
1. In a large bowl, or the bowl of your stand mixer, whisk together mashed sweet potato, buttermilk, egg, butter, sugar and yeast. (I learned the hard way that it is best to whisk these ingredients by hand rather than using the mixer. I ended up with buttermilk splattered all over the kitchen when I tried using the paddle attachment!) Let the mixture sit for a few minutes while you measure out about 7 cups of flour.
2. Using the paddle attachment for your stand mixer, stir in one cup of flour along with the salt. Gradually add more flour, about a cup at a time, until a soft dough begins to form. If using a stand mixer, switch to the dough hook (use a wet hand to pull the dough off the paddle attachment and it won’t stick to you) and knead on medium speed (speed 4 on the kitchen aid) for 6-7 minutes, adding a little more flour as needed to make a moderately soft dough that mostly clears the sides of the bowl (the dough should eventually clear the sides of the bowl, but continue to stick to the bottom as it’s being kneaded). My dough took about 6 1/2 cups of flour, but yours made need less or more. If mixing and kneading by hand, dump the dough out onto a floured surface when it gets too hard to mix with a spoon. Using well-floured hands, knead the dough for 8 - 10 minutes, adding flour as necessary to keep the dough from sticking to work surface and hands.
3. When you finish kneading, the dough should be moderately soft and tacky, but not sticky. To remove it from the bowl of your stand mixer, a bowl scraper is handy. If you don’t have one, a plastic spatula will also work. Scrape the dough out onto a lightly floured surface and knead a few times to form a smooth ball of dough. If you kneaded by hand, form the dough into a smooth ball. Cover dough with a towel, and clean out your mixing bowl. Spray the inside of bowl with nonstick cooking spray or grease it with butter or oil. Place ball of dough, smooth side down, into the greased bowl. Turn the dough over to grease the other side, then cover with the bowl with a towel or plastic wrap. Put bowl in a warmish place and let dough rise for a little over an hour or until it has doubled in bulk.
4. When dough has doubled (you can check by pushing your finger into the dough. If an indentation remains without filling in, the dough is ready to go), push it down with your fists to deflate it and dump it out onto a lightly floured surface. Cut the dough in half with a knife or bench scraper then cut each half into 8 equal pieces (or more if you want smaller rolls). Cover pieces with a towel and let rest for a few minutes before shaping. While dough is resting, preheat your oven to 375 degrees and move two oven racks towards the center of the oven. Also, line two baking sheets with parchment paper.
5. Shape rolls by rolling against the work surface or between your hands to form balls. I like to pull the skin taut over the top of the roll and pinch at the bottom to form a smooth roll, but use whatever method works for you. Divide the rolls between the two baking sheets, and cover with a towel. Let rolls rise for about 20 minutes then remove towel and sprinkle the tops very lightly with flour. Place baking sheets in preheated 375 degree oven and bake for 20-25 minutes until they are puffed and lightly brown. Rotate sheets halfway through baking time (move bottom to top and vice versa).
6. Let rolls cool slightly and serve immediately. Or, if making ahead, let rolls cool completely on wire racks then place in Ziploc bags. To reheat, wrap rolls in foil and place in 375 degree oven for a few minutes until heated through.
Notes
*For sweet potato puree, I microwaved 2 medium sweet potatoes for about 7 minutes (poke holes all over with a fork first). Let cool then peel off skins. Pass the potatoes through a ricer if you have one, or mash well to remove any lumps. Measure out one cup (it’s ok if you have a little less) and proceed with recipe.
**Buttermilk can be gently heated in the microwave or on stovetop until lukewarm.
Make sure all ingredients are at room temperature or slightly warm, if the dough is cold it will take longer to rise.
The amount of flour is an approximation, your dough will use more or less depending on many different factors. Don’t worry too much about how much you use, just mix a dough that you are comfortable kneading.
I made 16 rolls and they were on the large side, perfect for making little sandwiches. If you prefer small rolls, you can cut the dough into 24 pieces or even more. Keep in mind that smaller rolls will probably bake a little faster.
Nutrition Information:
Yield: 16 Serving Size: 1Amount Per Serving: Calories: 301Total Fat: 8gSaturated Fat: 5gTrans Fat: 0gUnsaturated Fat: 3gCholesterol: 31mgSodium: 452mgCarbohydrates: 48gFiber: 2gSugar: 7gProtein: 8g
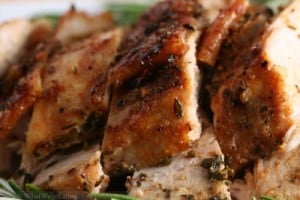
I hope some of you give these a try because they were really tasty! In the meantime, make sure you head over to What We’re Eating to see the Herb Roasted Turkey Breast Amanda prepared during our pre-holiday feast! It was delicious and would perfect for a small holiday gathering.
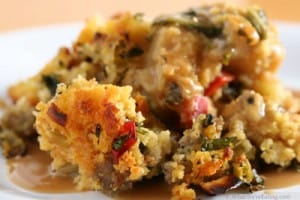
In case you missed any of the other recipes in our holiday series this month, you can see them all below. Click on a photo to be taken to the recipe. Happy holiday planning!
Sourdough Stuffing with Apples and Bacon
Mashed Potatoes with Cream Cheese and Sour Cream
Cranberry Applesauce with Fresh Ginger
And the Holiday Recipe Series continues over at What We’re Eating with:


Brenda says
Sue says
Donna says
Trine, Norway says
nancy ward says
baju anak says
Jennifer Spiller says
Noreen Gordon says
Jean Marie Kennedy says
Brenda says
Ellen Aronson says
Nicole says