Well, my sourdough starter is definitely alive, but I was hoping it would have doubled in size today. I’ve decided that now is the time to start feeding it twice a day, morning and evening, and keep up the regimen until it gets to the point where it will double in size within four hours or so. Once it gets to that point, it will be strong enough to bake with.
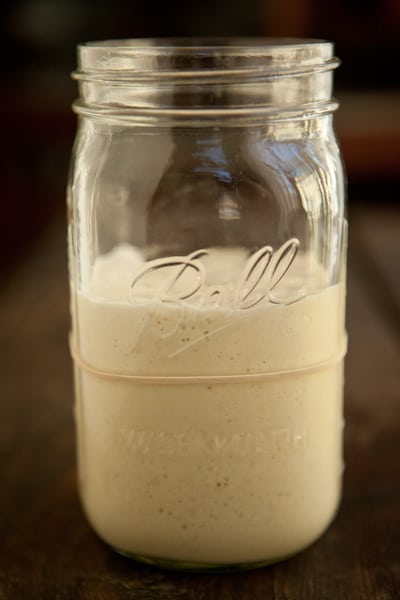
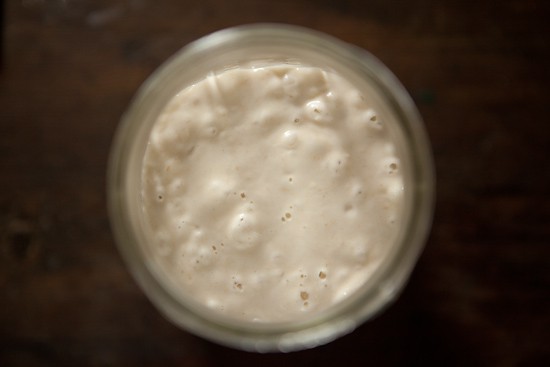
These photos were taken in the morning, about ten hours after feeding.
I am still feeding with the same amounts of flour and water. I discard half of what’s in the jar then stir in one cup unbleached all-purpose or bread flour plus 1/2 cup filtered water. I fed my starter in the morning (after taking the above photos) then marked the level with a rubber band.
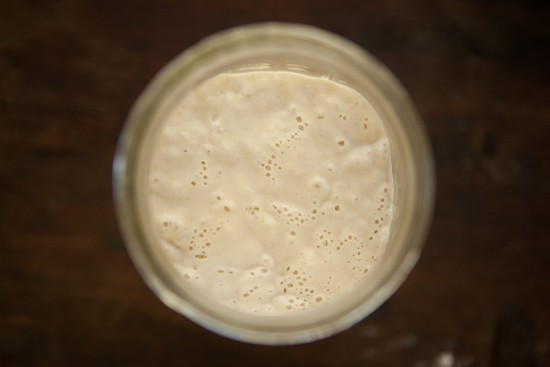
About 12 hours later, it had grown a bit more than before! It’s not quite doubled, but getting much closer.
Here’s a view of the bigger, more robust bubbles.
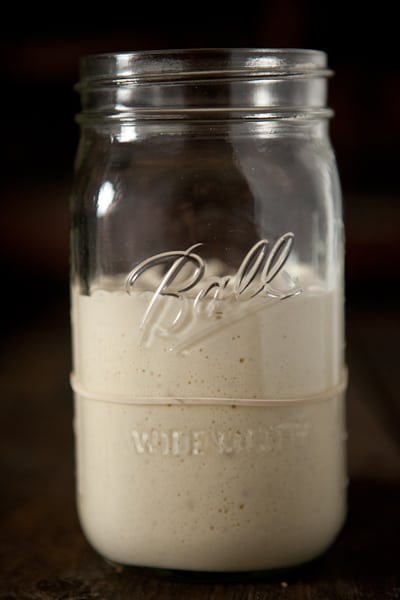
Things are looking good. I fed it once more before bed and will continue the twice daily feedings tomorrow.
Although this culture is a bit sluggish, we’re definitely getting somewhere. I can still smell a hint of pineapple (I can taste it, too), but I think that will be gone after a couple more feedings. I’m still not really sure how I feel about the pineapple juice method. It’s not any faster than starting with flour and water, but lots of people swear by it and it’s working for me even if it’s a bit slow. Whether you use water or pineapple juice, the biggest key to cultivating a sourdough starter is patience.
So, let’s talk a bit more about what’s actually been happening during this experiment. Although I’ve been referring to my jar of bubbly batter as a sourdough starter throughout these posts, it’s technically called a culture until it’s strong enough to bake with. Once it’s mature, it becomes a real sourdough starter, also known as a levain. But I think it’s fun to come up with your own name for your starter once it has matured. The last one I cultured at home was named Lyle (after Lyle Lovett, of course).
During the culturing process, we are trying to encourage the growth of wild yeast and certain benign bacteria. It’s a symbiotic relationship – these wild yeast thrive in an acidic environment, so they like the lactic and acetic acids produced by the bacteria. The yeast helps our bread rise, but it’s the acids produced by the bacteria that give the dough that distinctive sourdough tang.
Although it is commonly believed that we are trying to “catch” wild yeast from the air (and it’s true that wild yeast are everywhere), the truth is that the yeast is already in the flour. From what I understand, whole grain flour, especially rye, is a better source of this wild yeast than white flour, so that’s why we started with whole wheat or whole rye flour.
Fruits, such as grapes, are also sources of wild yeast, so you’ll see lots of different methods for cultivating a starter, including ones that use wild grapes.
Once you have a robust starter, you won’t have to keep feeding it twice a day (I’m sure that’s a relief!). You can safely store your starter in the refrigerator, where it will slow down then basically go dormant. It’s recommended to take it out and feed it once a week to keep it healthy, especially if it’s a newly established starter. You can (and should!) also dry or freeze small amounts of it to keep on hand in case you do accidentally lose your original starter.
Although the culture I’m creating right now is being fed with white flour, that doesn’t mean you can’t keep a whole wheat starter. You can feed your starter with whole wheat from the beginning and keep it that way or you can convert a white starter to whole wheat by changing its diet (and vice versa). There are no hard and fast rules when it comes to sourdough. Experiment and have fun!
Once you have a mature starter, there are lots of ways to use it even if you don’t feel like baking bread. I made the most delicious pancakes this morning using a cup of one of my well-established starters, 2 cups of freshly ground whole spelt flour, buttermilk, eggs, and melted butter. It was a recipe adapted from King Arthur Flour and it couldn’t have been simpler to make. You can make pancakes, waffles, muffins, cakes, biscuits, and more. My friend Linda from Salty Seattle has even been experimenting with sourdough fettuccine and I’m really hoping she’ll tell us about it soon.
Once my new starter has matured (hopefully in the next couple of days), I’ll start experimenting with it and sharing recipes – it should tie in nicely with the October Unprocessed Challenge I’ve signed up for next month. This is going to be fun and I’m really glad you guys are along for the ride!
I’ll be back tomorrow with another starter update and information on the health benefits of sourdough. Yep, it turns out that sourdough may actually be better for us than standard whole wheat bread. Stay tuned.
Want to create your own sourdough starter?
Here are the instructions (click on the links for photos):
Day One: In a small bowl, mix one cup of whole wheat or whole rye flour with 3/4 cup (6 oz) canned pineapple juice (at room temperature) until all of the flour is hydrated. Scrape mixture into a quart-size wide mouth glass container, such as a jar or glass measuring cup. Mark the level of the starter with a piece of tape or rubber band. Cover the container with a paper towel, cheesecloth, or coffee filter and secure with a rubber band. Leave at room temperature for 24 hours.
Day Two: You probably won’t notice much change at this point. Scrape the contents of the jar into a mixing bowl and add 1 cup of unbleached all-purpose plus 1/2 cup pineapple juice (make sure juice is room temperature). Mix until all ingredients are evenly distributed. Wash and dry your glass container and scrape the mixture into the container. Mark and cover the container just like day one. Let sit at room temperature for 24 hours.
Day Three: You may notice some activity at this point. The mixture may have risen some and there might be bubbles. Regardless of whether you notice any fermentation or not, discard half of the mixture (or give it to a friend to cultivate), and mix the remaining half with 1 cup of unbleached all-purpose and 1/2 cup filtered water (make sure water is room temperature). Wash and dry your container and scrape the mixture into the container. Mark and cover as before. Let sit at room temperature for 24 hours.
Day Four: The mixture should have at least doubled in size at this point. If it seems to be sluggish and hasn’t doubled in size, allow it to sit at room temperature for another 12 to 24 hours. Otherwise, repeat instructions for Day three.
Day Five: Feed the starter (repeating day three instructions) first thing in the morning and then again in the evening (about 12 hours apart).
Day Six: If your starter has been very active and always doubles in size (or more) between feedings, then your starter is ready to bake with. You may also choose to refrigerate your starter at this point and slow down the feedings to once a week. If you’d like to bake some bread, here is a basic sourdough bread recipe to get you started. If your starter still seems a little sluggish, continue with the twice daily feedings as above.
Day Seven: Same as above.

How to Make a Sourdough Starter
Ingredients
- 5-pound bag unbleached all-purpose flour
- 1 cup whole wheat flour or whole rye flour
- 1 1/4 cups pineapple juice
- filtered or bottled water*
Instructions
- Day One: In a small bowl, mix one cup of whole wheat or whole rye flour with 3/4 cup (6 oz) canned pineapple juice (at room temperature) until all of the flour is hydrated. Scrape mixture into a quart-size wide mouth glass container, such as a jar or glass measuring cup. Mark the level of the starter with a piece of tape or rubber band. Cover the container with a paper towel, cheesecloth, or coffee filter and secure with a rubber band. Leave at room temperature for 24 hours.
- Day Two: You probably won't notice much change at this point. Scrape the contents of the jar into a mixing bowl and add 1 cup of unbleached all-purpose or unbleached bread flour plus 1/2 cup pineapple juice (make sure juice is room temperature). Mix until all ingredients are evenly distributed. Wash and dry your glass container and scrape the mixture into the container. Mark and cover the container just like day one. Let sit at room temperature for 24 hours.
- Day Three: You may notice some activity at this point. The mixture may have risen some and there might be bubbles. Regardless of whether you notice any fermentation or not, discard half of the mixture (or give it to a friend to cultivate), and mix the remaining half with 1 cup of unbleached all-purpose or bread flour and 1/2 cup filtered water (make sure water is room temperature). Wash and dry your container and scrape the mixture into the container. Mark and cover as before. Let sit at room temperature for 24 hours.
- Day Four: The mixture should have at least doubled in size at this point. If it seems to be sluggish and hasn't doubled in size, allow it to sit at room temperature for another 12 to 24 hours. Otherwise, repeat instructions for Day three.
- Day Five: Feed the starter (repeating day three instructions) first thing in the morning and then again in the evening (about 12 hours apart).
- Day Six: If your starter has been very active and always doubles in size (or more) between feedings, then your starter is ready to bake with. You may also choose to refrigerate your starter at this point and slow down the feedings to once a week. If you'd like to bake some bread, here is a basic sourdough bread recipe to get you started. If your starter still seems a little sluggish, continue with the twice daily feedings as above.
- Day Seven: Same as above.
Notes
*The reason I suggest filtered or bottled water is that chlorinated water straight from the tap might make it more difficult for your starter to get going. Some people have had no trouble using filtered water, but if you're going to invest the time in creating a sourdough starter from scratch, why take any chances? I filter my tap water through a Brita water pitcher. Any cheap bottled water would be fine, too. The only thing we're trying to avoid is chlorine. If you know that your tap water is not chlorinated, feel free to use it without filtering it.
Leli Wiggins says
mARY ARENS says
Restaurants in Merthyr Tydfil says
Linda says
Donna says
jerry pelchat says
max says
Dick Voorheis says