• Skip to main content
  • Skip to primary sidebar

Pinch My Salt

Food, Recipes, and Photography

  • About
  • Contact
  • Links
  • Recipe List
  • Store
  • The BBA Challenge

How to Make a Sourdough Starter: Day Two

September 24, 2011 by Nicole 21 Comments

How to make a sourdough starter: Day 2 | pinchmysalt.com

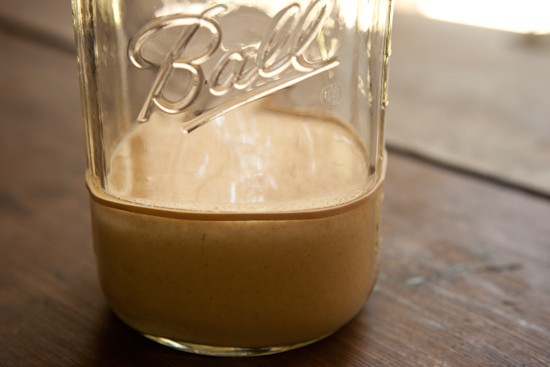
I’m back to tell you about day two of my sourdough starter experiment.  So, 24 hours later and my jar of flour and pineapple juice looks exactly the same.  But that’s okay, I wasn’t expecting any change yet.

How to make a sourdough starter: Day 2 | pinchmysalt.com

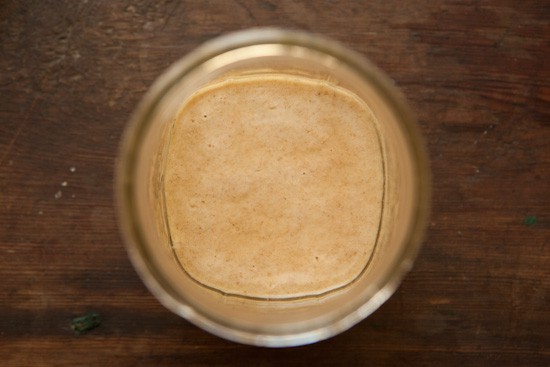
There were a few teeny tiny bubbles in the top, but I’m not sure if that’s a sign of activity or not.  Either way, it’s time to feed this thing.  I prefer to do this in a separate bowl so that I can clean out the jar and start fresh.  It makes it easier to read the level of the starter and see if any growth occurs tomorrow. (Update: this method works great! Scroll to the very bottom of the page for printable instructions.)

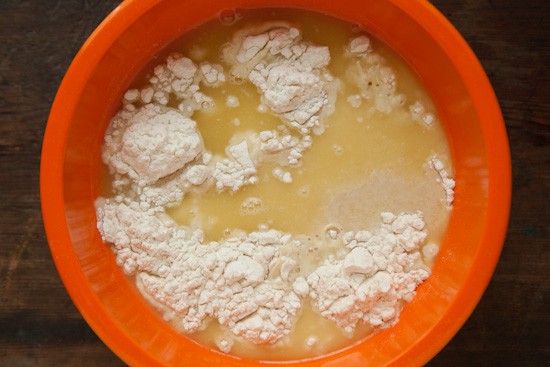
I scraped the contents of my jar into a mixing bowl and added 1 cup of unbleached all-purpose flour  (the type of flour has changed from yesterday) and 1/2 cup of pineapple juice.

How to make a sourdough starter: Day 2 | pinchmysalt.com

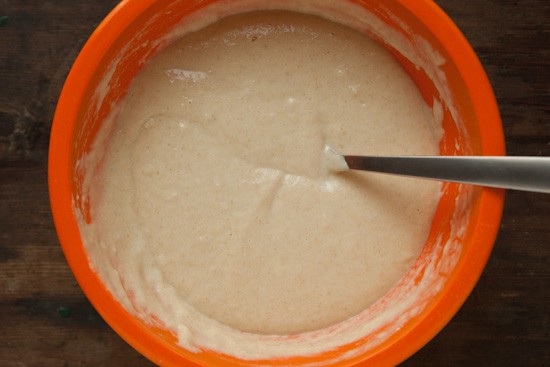
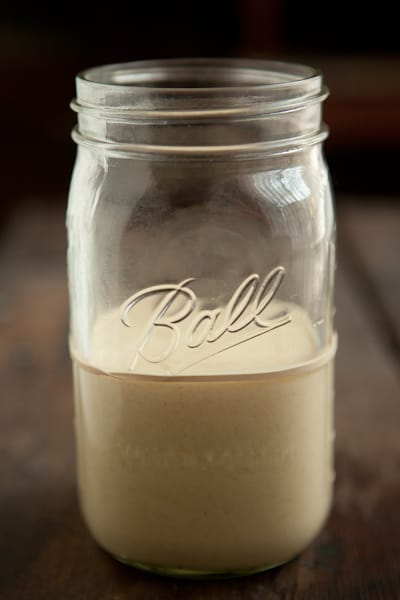
I mixed it all together until the all the flour was completely hydrated.  The consistency of my starter is kind of like a pancake batter.  I’ve already had some questions on Facebook about the thickness of the starter.  Depending on what brand of flour you used and how you measured the flour, you may end up with a thicker dough-like consistency.  That’s fine.  If you prefer it to be less thick, just add a bit more liquid.  It will still work – this process is pretty flexible.

How to make a sourdough starter: Day 2 | pinchmysalt.com

After mixing up today’s batch, I cleaned the glass jar and scraped the mixture back into the jar.  I used a rubber band to mark the level of the starter and covered the top with a paper towel secured with a rubber band, just like yesterday.  I’m hoping that by day three, I will notice some activity.

How to make a sourdough starter: Day 2 | pinchmysalt.com

Want to create your own sourdough starter?

Here are the instructions (click on the links for photos):

Day One: In a small bowl, mix one cup of whole wheat or whole rye flour with 3/4 cup (6 oz) canned pineapple juice (at room temperature) until all of the flour is hydrated.  Scrape mixture into a quart-size wide mouth glass container, such as a jar or glass measuring cup.  Mark the level of the starter with a piece of tape or rubber band. Cover the container with a paper towel, cheesecloth, or coffee filter and secure with a rubber band.  Leave at room temperature for 24 hours.

Day Two: You probably won’t notice much change at this point.  Scrape the contents of the jar into a mixing bowl and add 1 cup of unbleached all-purpose plus 1/2 cup pineapple juice (make sure juice is room temperature).  Mix until all ingredients are evenly distributed.  Wash and dry your glass container and scrape the mixture into the container.  Mark and cover the container just like day one.  Let sit at room temperature for 24 hours.

Day Three: You may notice some activity at this point.  The mixture may have risen some and there might be bubbles.  Regardless of whether you notice any fermentation or not, discard half of the mixture (or give it to a friend to cultivate), and mix the remaining half with 1 cup of unbleached all-purpose and 1/2 cup filtered water (make sure water is room temperature).  Wash and dry your container and scrape the mixture into the container.  Mark and cover as before.  Let sit at room temperature for 24 hours.

Day Four: The mixture should have at least doubled in size at this point.  If it seems to be sluggish and hasn’t doubled in size, allow it to sit at room temperature for another 12 to 24 hours.  Otherwise, repeat instructions for Day three.

Day Five: Feed the starter (repeating day three instructions) first thing in the morning and then again in the evening (about 12 hours apart).

Day Six: If your starter has been very active and always doubles in size (or more) between feedings, then your starter is ready to bake with.  You may also choose to refrigerate your starter at this point and slow down the feedings to once a week.  If you’d like to bake some bread, here is a basic sourdough bread recipe to get you started.  If your starter still seems a little sluggish, continue with the twice daily feedings as above.

Day Seven: Same as above.

How to Make a Sourdough Starter: Day 5 Pinch My Salt

How to Make a Sourdough Starter

Prep Time: 45 minutes
Additional Time: 7 days
Total Time: 7 days 45 minutes

Ingredients

  • 5-pound bag unbleached all-purpose flour
  • 1 cup whole wheat flour or whole rye flour
  • 1 1/4 cups pineapple juice
  • filtered or bottled water*

Instructions

  1. Day One: In a small bowl, mix one cup of whole wheat or whole rye flour with 3/4 cup (6 oz) canned pineapple juice (at room temperature) until all of the flour is hydrated. Scrape mixture into a quart-size wide mouth glass container, such as a jar or glass measuring cup. Mark the level of the starter with a piece of tape or rubber band. Cover the container with a paper towel, cheesecloth, or coffee filter and secure with a rubber band. Leave at room temperature for 24 hours.
  2. Day Two: You probably won't notice much change at this point. Scrape the contents of the jar into a mixing bowl and add 1 cup of unbleached all-purpose or unbleached bread flour plus 1/2 cup pineapple juice (make sure juice is room temperature). Mix until all ingredients are evenly distributed. Wash and dry your glass container and scrape the mixture into the container. Mark and cover the container just like day one. Let sit at room temperature for 24 hours.
  3. Day Three: You may notice some activity at this point. The mixture may have risen some and there might be bubbles. Regardless of whether you notice any fermentation or not, discard half of the mixture (or give it to a friend to cultivate), and mix the remaining half with 1 cup of unbleached all-purpose or bread flour and 1/2 cup filtered water (make sure water is room temperature). Wash and dry your container and scrape the mixture into the container. Mark and cover as before. Let sit at room temperature for 24 hours.
  4. Day Four: The mixture should have at least doubled in size at this point. If it seems to be sluggish and hasn't doubled in size, allow it to sit at room temperature for another 12 to 24 hours. Otherwise, repeat instructions for Day three.
  5. Day Five: Feed the starter (repeating day three instructions) first thing in the morning and then again in the evening (about 12 hours apart).
  6. Day Six: If your starter has been very active and always doubles in size (or more) between feedings, then your starter is ready to bake with. You may also choose to refrigerate your starter at this point and slow down the feedings to once a week. If you'd like to bake some bread, here is a basic sourdough bread recipe to get you started. If your starter still seems a little sluggish, continue with the twice daily feedings as above.
  7. Day Seven: Same as above.

Notes

*The reason I suggest filtered or bottled water is that chlorinated water straight from the tap might make it more difficult for your starter to get going. Some people have had no trouble using filtered water, but if you're going to invest the time in creating a sourdough starter from scratch, why take any chances? I filter my tap water through a Brita water pitcher. Any cheap bottled water would be fine, too. The only thing we're trying to avoid is chlorine. If you know that your tap water is not chlorinated, feel free to use it without filtering it.

© Nicole Cross
Category: Breads

Filed Under: Adventures in Baking, Breads, Sourdough

Previous Post: « How to Make a Sourdough Starter: Day One
Next Post: How to Make a Sourdough Starter: Day Three »

Reader Interactions

Comments

  1. bevanne crawley says

    September 25, 2011 at 7:21 am

    I just found this at theperfectpantryblog and was intrigued but do not have the rye or whole wheat flour I do however have the unbleached all purpose bread flour would that work? Id like to play along although I'm not a blogger but do follow several cooking blogs and have been considering making a blog of my own but jst don't know how to begin thanks in advance for any advice
    Reply
  2. Laura says

    September 25, 2011 at 7:57 am

    I think those bubbles were for real. I remember that it was on day three that I started seeing more bubbles and it was uphill from there. Can't wait to see what you use the starter for!
    Reply
  3. Nicki says

    September 25, 2011 at 9:14 am

    What is the reason for the switch to white flour today? Is that just the sourdough way? I am definitely not a bread-making expert. I do well with my bread machine, but that's as far as I've gotten! Thanks!
    Reply
  4. Nicole says

    September 25, 2011 at 11:02 am

    Bevanne - you can certainly give it a try with unbleached all purpose flour. It should work, but it might take a little longer than starting with whole grain flour. Or maybe you could just borrow a cup of whole wheat flour from a neighbor or buy a cup from the bulk bin at the store? Laura - I'm definitely seeing activity now! Nicki - I'm doing a white flour starter simply because the first loaf I'm going to talk about making on here will be a standard white sourdough loaf. After that, I may delve into whole wheat sourdough. At any time, the starter can be converted to whole wheat by feeding it with whole wheat flour for a few days. It's just a matter of preference :-)
    Reply
  5. Nicki says

    September 25, 2011 at 11:28 am

    Thanks Nicole! I love sourdough bread, so I'm definitely going to try this out!
    Reply
  6. Tracy says

    September 25, 2011 at 12:14 pm

    O.K., I've started one with whole wheat, and one with buck wheat flours. I look forward to mirroring your progress!
    Reply
  7. Tracy says

    September 26, 2011 at 10:38 am

    This is day 2, for me. I can tell that something has happened, in 24 hours, because the consistency has changed. It has become more 'foam-like'. This is very exciting!
    Reply
  8. Jenn says

    September 28, 2011 at 10:41 am

    Tonight I will be at Day 3's instructions, but I took a peek at the starter this morning. I'm a little nervous because on the surface of my starter, I see some black growth, with bubbles. Is this normal? Did I do something wrong and should start again?
    Reply
  9. Nicole says

    September 28, 2011 at 10:53 am

    Jenn - if you have black mold growing on the starter, you'll need to start over. Not sure what would be causing it, but it definitely shouldn't be black at this point. I would dump it out, wash everything really well and start fresh. Sorry!
    Reply
  10. Annie says

    November 13, 2011 at 5:36 pm

    It looks like you used a metal spoon (or something) to stir your starter. Does using metal make a difference? I've heard that it's not good--only plastic or wood should be used. I'd like your take on this.
    Reply
  11. Jenn says

    November 13, 2011 at 6:17 pm

    I used a metal whisk - but I used it also when I started over. The second time was a charm - I have a starter that I keep in my fridge now.
    Reply
  12. Emily says

    December 8, 2011 at 9:59 am

    question. I started a starter in June and it is definitely alive, but it has never doubled in size. It foams a little then settles down and I just get the hootch on top after abt 24 hrs. I feed it with all-purpose and distilled water, and when I use some to bake with I feed it, then separate out what I want to use. The only flour that I've had success with in baking it is bread flour. If I use any other flour to bake with I don't get a good rise with it no matter how long I let it sit....any ideas??
    Reply
  13. Annie says

    December 8, 2011 at 12:21 pm

    Sorry you are having problems Are you leaving the starter in the fridge? I only put mine in the fridge when I'm not going to be baking for a day or two just to slow down the activity. It's hard to say what is going on with your starter. I followed Nichole's recipe exactly and have had fantastic results. For white flour bread I have been using King Arthur All-Purpose though I'm going to try something else when I run out. I have also had great results using organic white whole wheat and really outstanding results with a rye/white mix. After feeding my starter it will frequently double in height within 5 or 6 hours! Also, I don't use distilled water; only purified tap water. Maybe your starter wants minerals! I think, if I was having your problems I might consider starting over from scratch making a brand new starter. Maybe it's got a bad bug in it that's slowing it down--that can happen to anybody.
    Reply
  14. kim says

    April 10, 2016 at 4:46 pm

    On day two my starter double so fast if overflowed in the first 3 hours. Is this bad, should I feed it earlier that the 24 hours or let it keep going?
    Reply
  15. kim says

    April 10, 2016 at 4:49 pm

    My starter doubled and overflowed like yours did above only it happened in about 3 hours. I feel like it will break like a sauce but not sure. Should I just let if keep going or stir and take some out?
    Reply
  16. Brian says

    September 25, 2016 at 7:51 pm

    When you say filtered water. Does that mean like bottled water, distilled water, or like Brita filtered tap water? I've tried this 3 times now and have not gotten much rise. Now at day 4. I started out using whole wheat king aurthor flour then switched to all purpose white unbleached flour and have been using bottled water from day 2 onward. I live in a low humidity area. 20-30% and the typical temp in the house is around 70F.
    Reply
    • Nicole says

      September 26, 2016 at 6:27 am

      Brian- Pretty much any water will be fine as long as it isn't chlorinated tap water as the chlorine could harm things. I use Brita-filtered tap water. Bottled water is fine as well, doesn't matter what kind. If you still aren't getting much activity, try stirring the mixture vigorously a couple times a day. This should also help with that skin that keeps forming. You can also cover with plastic wrap to help keep the skin from forming. Don't seal it completely, but most of the way. Hope this helps!
      Reply
  17. Brian says

    September 25, 2016 at 7:53 pm

    The top each day seems to form like a skin. Can touch it without breaking the surface. I'm using an 7" diameter glass bowl as I don't have a jar large enough. It's only about half full.
    Reply
  18. Annie says

    September 28, 2016 at 12:01 pm

    Brian, try keeping a kitchen towel (not terry cloth) draped over the bowl to help keep the surface of the starter from drying out. Or slip your bowl into a plastic bag that you don't seal; just let it hang a little loose near its opening so that your starter can "breathe" Also, try to find a jar. Any well-washed quart (or close to a quart) jar will do. When it does dry out you can just stir that "skin" into the starter--it will soften up.
    Reply
  19. Courtney says

    July 1, 2020 at 1:24 pm

    On days four and five, do you only use half like you did on day three?
    Reply
    • Nicole says

      July 14, 2020 at 9:37 am

      Yes, you continue the same method.
      Reply

Leave a Reply Cancel reply

Primary Sidebar

Follow

  • Facebook
  • Instagram
  • Pinterest
  • RSS
  • Twitter

Posts by Category

Copyright © 2021 · Privacy · Terms and Conditions