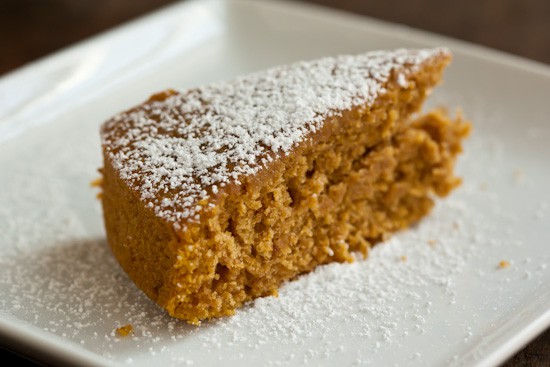
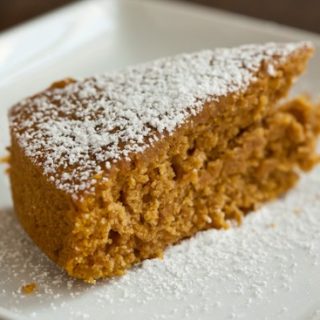
I created this delicious pumpkin maple sourdough cake by replacing part of the flour and liquid in a simple pumpkin cake with sourdough starter. It’s a great way to use up sourdough discard from feeding your sourdough starter. You’ll find a printable recipe at the bottom of this post.
Welcome back to Doughvember! This week, Linda and I are giving away sourdough-related prizes, so keep reading if you’re interested in today’s giveaway.
Have you had any sourdough adventures yet this month? I’m saving my bread baking for the second half of the month, but this week I decided to experiment with using sourdough starter to replace part of the flour and water in a simple pumpkin maple sourdough cake.
The great thing about keeping a sourdough starter is that you can experiment with using it in all sorts of recipes. As long as you know the percentage of flour to water in your starter, it’s easy to figure out how much flour and liquid to replace in a recipe.
I keep my sourdough starter at 100% hydration. That means that I feed it with equal parts flour and water (by weight). If you’ve followed my instructions for creating and maintaining a sourdough starter and have been feeding it with one cup of unbleached all-purpose flour and 1/2 cup water at a time, yours should be very close to 100% hydration because one cup of flour and 1/2 cup of water are close to the same weight (about 4 oz).
If you’re interested in keeping your starter at 100% hydration and you’d like to be exact, you should start weighing your ingredients when you feed your starter.
Maintaining a Sourdough Starter at 100% Hydration
In order to keep your starter healthy, you should be doubling the amount each time you feed it. Since you don’t want the starter to take over the kitchen, you need to use or discard a portion of the starter before feeding it.
A good amount of sourdough starter to keep on hand at any one time is 16 ounces (which is about 2 cups by volume). To feed the starter by weight, measure out 8 ounces of your starter and use or discard the rest. Feed the 8 ounces of sourdough starter with 4 ounces of flour and 4 ounces of filtered water (water should be at room temperature or lukewarm – never hot to the touch).
Now you have doubled the amount of starter and you’re keeping it at 100% hydration. If you need to increase your amount of starter for a recipe, just keep doubling the amount until you have what you need for the recipe (plus extra to keep on hand). If you’d like to keep a smaller or larger amount on hand, that’s fine, too. Just remember to always double the amount (by weight) when feeding.
Using Sourdough Starter in Recipes
By keeping your starter at 100% hydration, you know that it is always half water and half flour by weight. So 8 ounces of 100% hydration sourdough starter is always equal to 4 ounces of flour and 4 ounces of water. This makes it fairly easy to use discarded sourdough starter in any recipe that uses flour and liquid, especially quick breads.
For example, If you want to use one cup of sourdough starter in a muffin or quick bread recipe, you just need to remember that you’ll be replacing 4 ounces of flour (about 1 cup by volume) and 4 ounces of liquid (1/2 cup by volume) in the recipe.
Of course it’s not exactly that simple. Sourdough starter is acidic, so if you want to swap it in without changing any of the leavening amounts, it works best in recipes that would normally have an acidic liquid like buttermilk. But don’t let any of this scare you. Experiment and have fun!
One thing to keep in mind is that when using sourdough starter in a quick bread or cake recipe, it’s not necessarily going to make your baked goods taste like sourdough bread.
The “sour” flavor in sourdough bread is developed over the long, slow fermentation times that most of those breads require. In quick breads, the starter will add an extra bit of flavor and the texture will be a bit different, but it’s usually very subtle.
On to the pumpkin cake. Since I’m still trying to avoid refined sweeteners as much as I can and because I thought it would be a great flavor combination, I used maple syrup in place of sugar to sweeten this cake.
As cakes go, it’s not especially sweet, but after sampling a few slices Phil and I both decided that it was just sweet enough. If you’d like to increase the dessert factor of this cake, a smear of cream cheese frosting would be just perfect.
Doughvember Roundup
Now I’d like to share a few of my favorite things I’ve seen around the web so far this Doughvember.

Linda, my partner in sourdough this month, has created yet another Doughvember masterpiece. She wrapped a seared beef tenderloin with comte cheese and sourdough and then baked the whole thing.
She then served the Sourdough-Comte Beef Wellington with Port-Fig Compound Butter. Head over to Salty Seattle for the recipe and another chance to win a Mavea filtered water pitcher (remember, sourdough starters prefer filtered water).
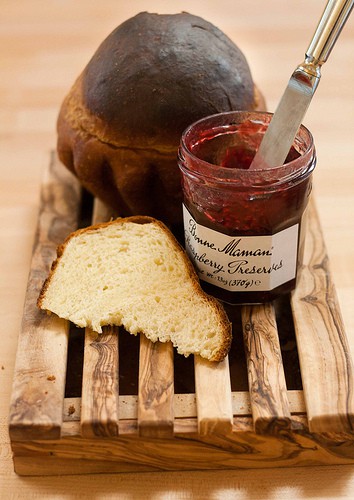
Sara from Three Clever Sisters decided to combine her loves of sourdough and brioche by making this beautiful Sourdough Brioche using the formula found in Tartine Bread (a book that is on my Christmas wish list).
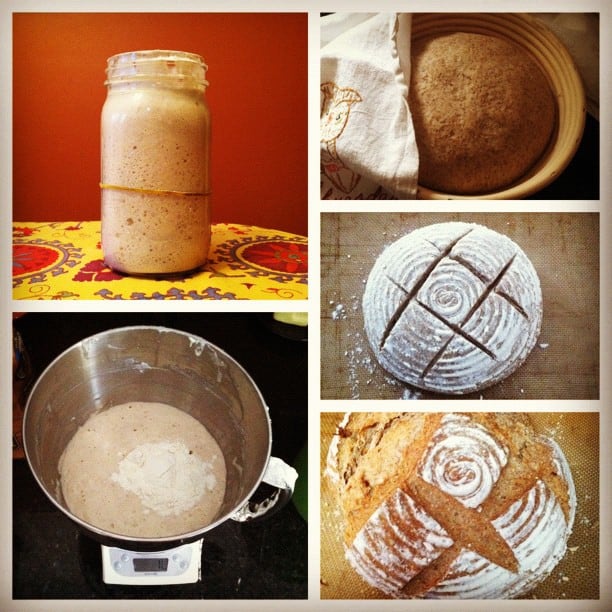
Kerrie from Serves Four has been keeping us updated on her sourdough baking via Instagram and I love this photo arrangement she created that shows her process of baking a gorgeous loaf of sourdough bread.
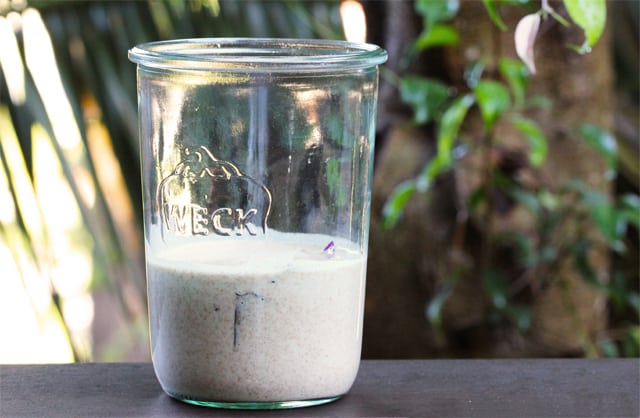
Brandon from Kitchen Konfidence has been writing about his adventures in creating a sourdough starter from scratch using a slightly different method than the one I’ve written about here.
His starter begins with whole wheat flour, water, and a red cabbage leaf. It might sound strange, but it’s actually a great way to get a sourdough culture started, especially if you’ve had trouble getting one going in the past. The white film that is usually visible on red cabbage (and on grapes) is actually wild yeast. Check out his progress on Kitchen Konfidence.
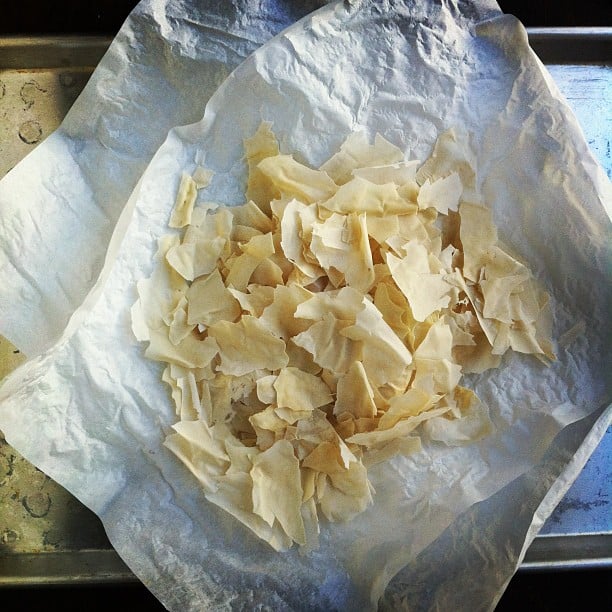
And finally, here’s a photo of what I’ve been up to with my sourdough starter lately. I dehydrated a bunch of it to take with me to the International Food Blogger’s Conference in Santa Monica this weekend.
I powdered it and divided it into 20 packets to hand out to anyone who wants one. If you’ll be at the conference and are interested in some starter (plus instructions for bringing it back to life), find me!
If you’re interested in dehydrating some of your own starter for long-term storage or for mailing to friends, you can find good instructions at Chocolate & Zucchini.
We have been following and communicating with the growing community of Doughvember bakers on Facebook, Twitter, and Instagram. If you’re talking about sourdough on twitter and/or posting photos of your creations on Instagram this month, please use the hashtag #Doughvember so we can all see what you’re up to.
If you write a blog post this month featuring sourdough, send Linda or I the link (or post it in a comment). I’ll continue sharing links and photos throughout the month and we’ll hopefully come up with a big Doughvember roundup at the end of the month.
If you’d like to create your own sourdough starter from scratch and play along with us, you can find detailed instructions here.
Pumpkin Maple Sourdough Cake
Ingredients
- 1/2 cup pumpkin or squash puree (canned or homemade)
- 1/2 cup maple syrup
- 1 egg, lightly beaten
- 1 teaspoon vanilla extract
- 1 cup "fed" 100% hydration sourdough starter
- 3/4 cup whole wheat flour (I used white whole wheat flour)
- 1/2 teaspoon baking powder
- 1/2 teaspoon baking soda
- 1/4 teaspoon salt
- heaping 1/2 teaspoon pumpkin pie spice
- 4 tablespoons unsalted butter, melted
Instructions
- Preheat oven to 400 degrees and move rack to center position. Butter an 8-inch round cake pan (or coat with baking spray).
- Start with all ingredients at room temperature. In a mixing bowl, whisk together squash puree, maple syrup, egg, and vanilla.
- Fold sourdough starter into squash mixture until well combined.
- In a separate small bowl, whisk together flour, baking powder, soda, salt, and pumpkin pie spice.
- Add dry ingredients to squash mixture and stir just until incorporated. Stir in melted butter.
- Pour batter into the greased 8-inch round cake pan.
- Bake at 400 degrees for about 25 minutes or until cake springs back when lightly touched.
Nutrition Information:
Yield: 8 Serving Size: 1Amount Per Serving: Calories: 215Total Fat: 7gSaturated Fat: 4gTrans Fat: 0gUnsaturated Fat: 3gCholesterol: 39mgSodium: 189mgCarbohydrates: 35gFiber: 3gSugar: 13gProtein: 5g
Kristen Kemp says
J says
Stephanie Worrell says