
Pretty, aren’t they? These delicate, crisp, lightly sweetened Scandinavian Rosettes are as delicious as they are beautiful. The “cookies” are made from a thin, crepe-like batter that is quickly deep fried on a specially shaped rosette iron.
Rosettes are traditional Norwegian and Swedish Christmas cookies that are a delight to make, share, and eat.
This post may include Amazon affiliate links. Making purchases through these links won’t affect the amount you pay and I may earn a small commission.
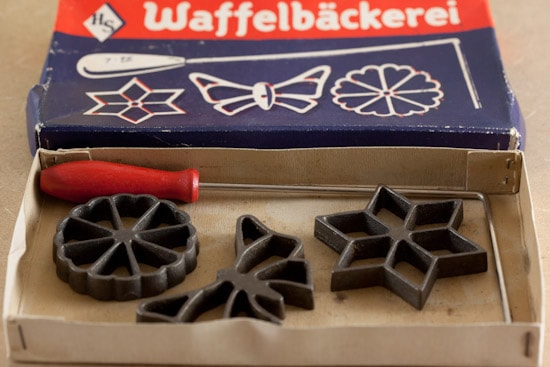
I’ve had this old rosette iron packed away in my kitchen for years. I inherited it from my mom’s kitchen, where it had also been packed away for years.
By the time it came to me, the instruction booklet and recipe were nowhere to be found– I didn’t even know that it was called a rosette iron. But there is a reason why I kept it all this time.
I have wonderful childhood memories of my mom using this iron to make beautiful, light, crisp cookies that were sprinkled with powdered sugar. They were delicious and I wanted to make them again someday.
My great-grandmother was from Norway and I think that the rosette iron and recipe must have originally come from Grandma Karen’s kitchen. I bet my mother had the same memories of these delicious cookies from her childhood as I have from mine.
I’m grateful that she shared them with my sister and I all those years ago and I’m thankful that she held on to the rosette iron, even though the recipe was lost.
Although I couldn’t remember what they were called, I did have a few recollections of how the cookies were made. I knew that the iron was dipped into a type of batter and that the batter was then deep fried.
I just couldn’t remember how it was fried or how the cookies were removed from the iron. I knew I’d run across a recipe someday and figure out how to make them for myself.
Recently I was sent a review copy of The Gourmet Cookie Book – a gorgeous new book featuring the best cookie recipe from each year of Gourmet magazine between 1941-2009.
I fell in love with this book as soon as I opened it. I love the bold graphic design and that each recipe has a full-page color photo to accompany it. I found myself reading through the book, cover to cover, fascinated by the history and the recipes.
Can you guess what I found toward the end of the book? A photo that instantly took me back to my childhood– Scandinavian Rosettes that looked exactly like the ones my mom made when I was young!

I knew as soon as I saw the recipe that I would finally be able to use my great-grandmother’s rosette iron to recreate one of my favorite childhood food memories. The instructions were clear and easy to follow.
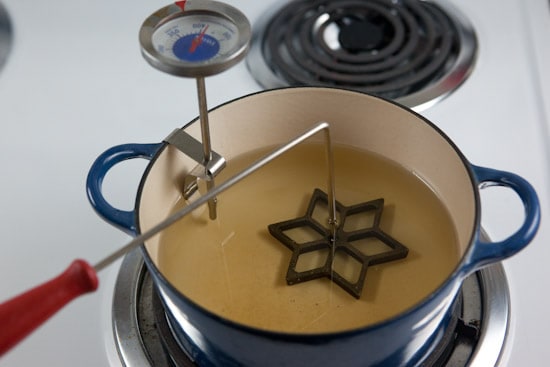
First, I added some peanut oil to a small, heavy dutch oven. I attached a thermometer to monitor the oil temperature and put the rosette iron in the pot to heat up with the oil.

While the oil was heating, I mixed up a thin, lightly sweetened batter of eggs, milk, and flour.
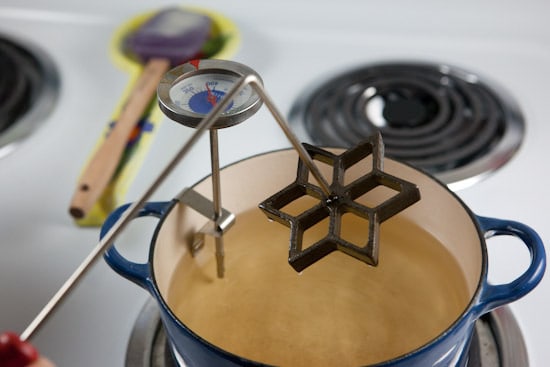
When the oil temperature was hot enough, I carefully removed the iron and let the excess oil drip back into the pot.

Then I carefully dipped the hot iron into the batter. It sizzled when it hit the batter, but didn’t splatter. The iron should only be dipped far enough to let the batter attach to the bottom and sides— it should never come up over the top of the iron.
Leave the iron in the batter for a few seconds, then lift it up and let the excess drip back into the bowl.
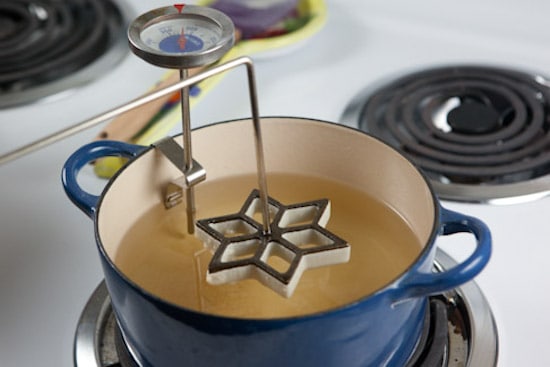
Next, I moved the iron back over to the hot oil. Here you can see the batter attached to the iron before it was fried.

When you dip the iron back into the hot oil, it will sizzle and bubble, but I had no problems with splattering.
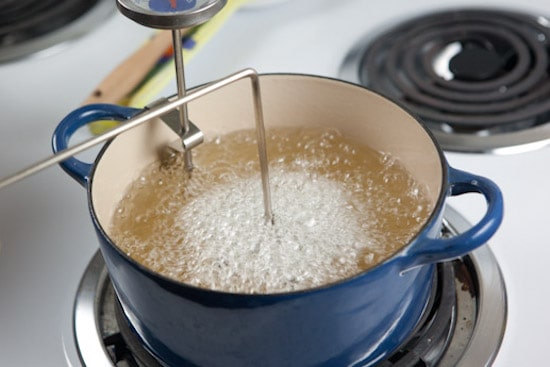
Submerge the iron in the oil, but don’t let it touch the bottom of the pot.
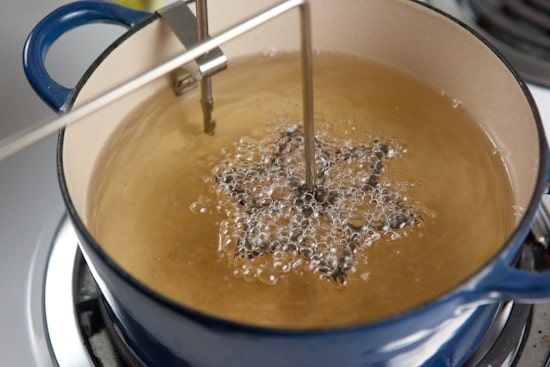
The rosette will take only about 30 seconds to cook. You’ll know when it’s ready because the bubbles will start to subside like this.
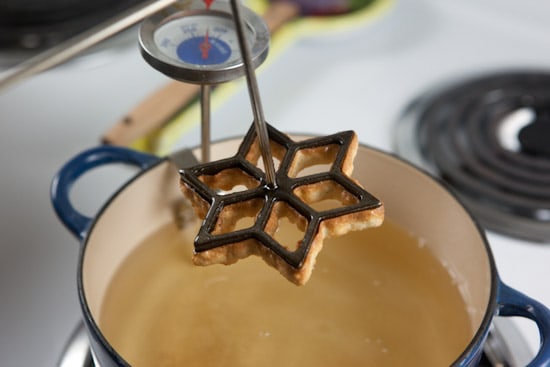
Pull the rosette out of the oil and let the excess oil drip back into the pot before moving it over to a paper towel-lined plate.

Gently pry the rosette from the iron with a fork. It should release easily.

Once it’s removed from the iron, you’ll want to flip it right-side-up to drain on the paper towels. These were my first attempts, and as you can see, the first ones were too dark.
It took a few tries to figure out how long to leave the rosettes in the oil, but the recipe makes about three dozen cookies so there is definitely room for error.

Soon I had a pile of beautiful, perfectly golden rosettes.
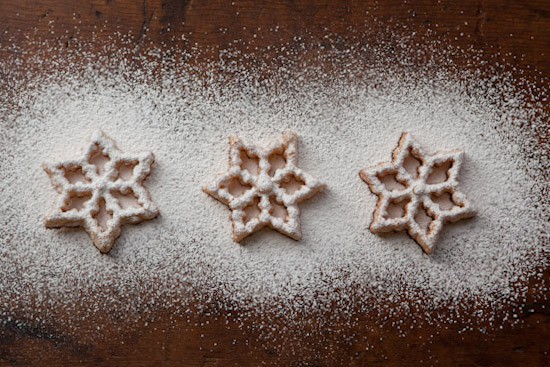
I sprinkled them with powdered sugar and after one bite I knew that the recipe was right. These tasted just like I remembered!
I look forward to these becoming a Christmas tradition in my family once again and I can’t wait to try more recipes from The Gourmet Cookie Book!
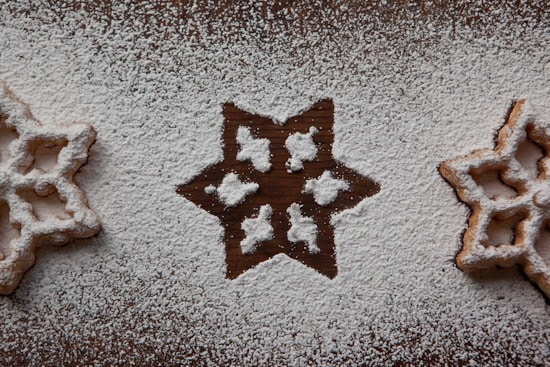
Other ideas for Christmas Cookies:
- Basic Cookie-Cutter Sugar Cookies
- Persimmon Cookies
- Raspberry Almond Thumbprint Cookies
- Brown Sugar Shortbread
- Dark Chocolate Cherry Chews
- Butterscotch Corn Flake Candy
Christmas Cookies around the Web:
- White Gingerbread Cookies from nami-nami
- Lebkuchen – German Christmas Cookies from Brown-Eyed Baker
- Chocolate-Dipped Orange Butter Cookies from Smells like Home
- Candy Cane Cookies from CakeSpy
- Minty Chocolate Christmas Cookies from 101 Cookbooks

Scandinavian Rosettes
A traditional Norwegian and Swedish Christmas cookie made by dipping a rosette iron in batter before deep frying in hot oil.
Ingredients
- 2 large eggs
- 2 tablespoons granulated sugar
- 1 cup whole milk
- 1 teaspoon vanilla
- 1 cup all-purpose flour
- 1/4 teaspoon salt
- 1 1/2 quarts (6 cups) vegetable oil
- 1/4 cup confectioners’ sugar (powdered sugar) for dusting
Instructions
- Whisk together eggs, granulated sugar, milk, and vanilla in a large bowl, then add flour and salt, whisking until combined.
- Heat oil in a 3- to 4-quart heavy saucepan with rosette iron in it until thermometer registers 370 to 375 degrees F. Carefully lift out iron, letting oil drip off into pan. Dip all but top edge of iron into batter for 3 seconds, then submerge iron in oil and fry (batter adhering to iron) until golden, 35 to 40 seconds (do not let iron hit the bottom of the pan). Lift out iron, letting oil drip off, and, working over paper towels, carefully pry off rosette with a fork.
- Let rosette drain, hollow side down, on paper towels, then make more rosettes in the same manner, heating iron in oil 10 seconds before dipping into batter each time.
- Dust rosettes with powdered sugar before serving.
Notes
Rosette irons are available from specialty kitchen shops or online from Amazon. Although most of what I’ve seen online are cast aluminum irons, you can sometimes find cast iron ones like mine on ebay.
This recipe can easily be halved.
The rosettes are best eaten within one day of being made, but they can be kept, layered between sheets of wax paper or parchment paper, in an airtight container at room temperature for up to two days.
This recipe was reprinted with permission from The Gourmet Cookie Book.
Tina @ Babycakes Blog says
Margaret says
Matilda says
Roxanne says
B Peters says
Korte says
Korte says
Byrdie says
Byrdie says
Ruby Garcia says
r says
Lee wei says
morgan01247 says
Phyllis says
Nicole says
Larry Sanderson says
Nicole says
Sharlene says
Christa says
Jody says
Susan Kline says
Dami says